Water adds movement and atmosphere to a garden, but it also exposes resin statues to constant moisture. Learning How to waterproof a resin statue for a fountain? starts with understanding the material, the water path, and the statue’s existing finish. Resin may look solid, yet tiny pores, seams, and hairline cracks can absorb water. Freeze-thaw conditions make those weaknesses worse. Even a sheltered fountain needs protection.
David A. Scott, a conservation scientist, offers a useful warning: “A coating is a barrier, not a cure for trapped moisture.” That principle should guide every repair. A waterproofing project should begin with careful cleaning, complete drying, and close inspection around the base, joints, and painted details. A soft brush can reveal residue. A bright work light can expose subtle cracks. Do not rush this stage. Moisture hidden inside the statue can blister a new coating within weeks.
This guide explains how to choose a compatible exterior sealer, prepare resin without damaging its surface, and apply thin, even coats. It also considers fountain-specific problems, including splashing, algae, mineral deposits, and constant water contact. Some statues may need a raised mounting point rather than more sealant. That detail is easy to miss. Results can vary because resin formulas, old paints, and local weather differ. Testing the product on an unseen area remains wise, even when the label promises complete waterproofing.
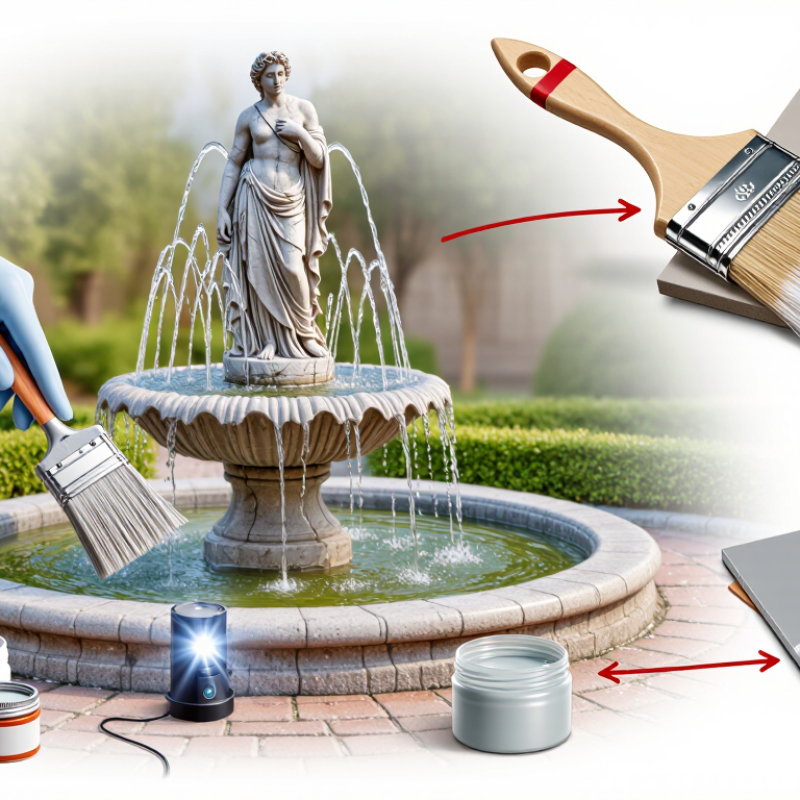
Before waterproofing a resin statue, inspect both the sculpture and its fountain setting. Resin should feel firm, dry, and free from soft or sticky areas. Look closely at the feet, seams, thin fingers, and underside. These areas often hide hairline cracks or trapped moisture. I once overlooked a small base crack, and water later entered during repeated fountain cycles. It was an avoidable mistake.
Check for peeling paint, cloudy patches, old sealers, and powdery surfaces. Gently tap suspicious areas and compare their sound with solid sections. Do not rely on appearance alone. Pressing too hard can damage fragile details. Record every defect with close photographs before cleaning.
The fountain also needs a careful assessment. Observe where water splashes, collects, or runs behind the statue. Check the basin drain, pump flow, and overflow path. Constant standing water can weaken exposed resin over time. Direct sunlight may heat one side, while cold nights create repeated expansion and contraction. Hard water can leave mineral deposits that interfere with adhesion. Clean water is not always chemically gentle.
Place the statue in a dry area and let it dry fully before testing repairs. A moisture meter can help, but it is not essential for small pieces. Cover one hidden section with the intended sealer and inspect it after twenty-four hours. Watch for softening, discoloration, bubbles, or poor bonding. I used to assume one waterproof coating solved everything. That assumption was too simple. A damaged surface, poor drainage, or excessive pump spray can defeat careful sealing.
Assess the resin statue and fountain conditions before selecting a waterproofing system. Higher scores indicate greater preparation and protection needs.
Assessment guide: Surface preparation is essential for adhesion, while continuous water contact, sunlight, freeze–thaw exposure, and existing cracks increase the need for a flexible, UV-resistant, water-compatible coating. Repair cracks and remove loose material before waterproofing.
Before waterproofing a resin statue, clean its surface carefully. Remove algae, dust, and mineral deposits with mild soap and lukewarm water. Use a soft brush around facial details, cracks, and textured areas. Avoid harsh solvents, abrasive pads, and high-pressure spray. They can weaken the resin or erase fine details.
Rinse the statue thoroughly, then inspect it under bright light. Look for hairline cracks, loose pieces, peeling paint, or soft spots. I usually let the statue dry for at least 24 hours. Larger pieces may need 48 hours. Water can remain inside tiny cavities, even when the outside feels dry. That delay is easy to underestimate.
Repair damage before applying any waterproof coating. Fill small cracks with a resin-compatible repair compound, then smooth the area after curing. Sand gently and remove every trace of dust with a clean, dry cloth. Do not seal over damp repairs. I once rushed this stage, and trapped moisture caused cloudy patches beneath the finish. The mistake was preventable. Check the surface again before coating, especially around the base and hidden joints. A clean, dry, stable surface gives the waterproof layer a stronger chance to bond and protect the statue in fountain conditions.
Select a Fountain-Safe Waterproof Coating
Choose a coating tested for continuous immersion, not only rain exposure. Fountain water repeatedly wets the statue, then dries into mineral deposits. A suitable coating should resist water, algae-cleaning chemicals, ultraviolet light, and temperature changes. Check the technical data sheet for immersion time, curing conditions, and resin compatibility. Some coatings look perfect after application but soften around submerged joints.
Use measurable evidence. ASTM D3359 rates adhesion from 0B to 5B; higher ratings indicate stronger resistance to tape-pull failure. Ask for independent test results, not only marketing claims. ASTM D4060 measures abrasion loss in milligrams, which helps compare surface durability. Lower mass loss usually indicates better wear resistance. These tests do not prove fountain safety alone.
The coating must also suit the water system. For fountains connected to potable-water equipment, review materials evaluated under NSF/ANSI/CAN 61. For decorative fountains, confirm that the cured coating does not release harmful substances into recirculating water. Clean the resin thoroughly, remove dust from carved details, and repair pinholes before coating. Apply several thin layers. Thick films can trap moisture beneath the surface.
Follow the stated cure period. It is often longer in cool, humid weather. I once underestimated this step; the surface felt dry but marked easily under a fingernail. That mistake matters. Test a hidden area for adhesion, gloss change, and water contact before coating the entire statue.
Waterproofing a resin statue for a fountain starts with a dry, stable surface. I wash away dust, algae, and old residue, then let the statue dry completely. A hidden moisture pocket can cloud the coating later. I inspect seams, drain holes, and the base for hairline cracks. Small repairs must cure before coating. Rushing this stage usually creates more work.
Choose a coating rated for outdoor resin and repeated water exposure. Test it on a concealed area first. Some finishes remain tacky or change the statue’s color. I apply the coating in even, controlled layers with a fine brush or small foam applicator. Thin coats are easier to level than one heavy coat. Keep the brush moving gently, especially around carved details. Heavy buildup can trap bubbles and hide surface texture. Let each layer cure according to the manufacturer’s instructions before adding another. I usually inspect the surface under angled light. Uneven shine reveals missed areas.
Do not ignore the underside. Water often gathers around the base and seams. I coat these zones carefully, without blocking drainage openings. The finish should look continuous, not thick. After the final layer cures, I place the statue outdoors without running the fountain for a day. Then I test it with short water cycles and check for whitening, peeling, or soft spots. I have occasionally found a thin patch only after testing. That is frustrating, but useful. The damaged area must dry fully before careful touch-up. Regular inspections matter, especially after freezing weather or strong sunlight.
A resin statue needs more than a glossy coat before entering a fountain. Start with a fully cured surface, because trapped moisture can weaken adhesion. Follow the coating maker’s curing time, temperature, and humidity requirements. Keep the statue indoors, raised on blocks, with air moving around its base. It should feel dry, firm, and free from a strong chemical smell. Keep it dry. Do not rush this stage.
Inspect every seam, hollow edge, drain hole, and contact point under bright side lighting. Small pinholes often appear as dark dots or tiny craters. Fill gaps with a compatible repair material, let them cure, then sand rough ridges lightly. Remove dust with a clean, dry brush. My first inspection missed a hairline crack beneath the pedestal. Water found it within days. I now rotate the statue slowly and photograph hidden areas before sealing.
Apply thin, even coats rather than one heavy layer. Work around the face, underside, and base without creating puddles. Respect the full curing time between coats. Then test gently. Place the statue on a waterproof tray and run clean water over it for fifteen minutes. Check for whitening, bubbles, tackiness, leaks, or softened patches. Let it dry completely and repeat the test after twenty-four hours. A fountain exposes weak spots through splashing, vibration, and temperature changes. If water reaches the resin, stop using the statue, dry it thoroughly, and repair the failed area instead of hiding it with another coat.
| Step | Work Area | Recommended Action | Typical Time | Acceptance Criteria | Record to Keep |
|---|---|---|---|---|---|
| 1 | Surface Preparation | Remove dust, grease, loose paint, and surface residue. Wash with a mild detergent, rinse thoroughly, and allow the resin to dry completely. | 24–48 h | Clean, dry, and free of visible contamination | Cleaning date and visible condition |
| 2 | Crack and Joint Repair | Fill pinholes, casting voids, seams, and hairline cracks with a compatible resin repair compound. Feather the edges after curing. | As specified by repair material | No open gaps, soft spots, or visible channels | Repair locations and product batch details |
| 3 | Abrasion and Masking | Lightly abrade glossy areas to improve coating adhesion. Remove sanding dust and mask openings, moving parts, electrical components, and areas that must remain uncoated. | 1–3 h | Uniformly keyed surface without exposed deep scratches | Abrasive grade and masked areas |
| 4 | Waterproof Coating Application | Apply a coating specifically rated for continuous or intermittent water exposure. Use thin, even coats and follow the manufacturer’s specified recoat interval. | 2–3 coats; recoat per label | Continuous coverage with no pinholes, runs, or bare resin | Coat count, application method, and ambient conditions |
| 5 | Initial Cure | Keep the statue protected from rain, splashing, dust, and condensation. Maintain the temperature and humidity range required by the coating instructions. | Usually 24–72 h | Surface is dry, firm, and not tacky | Cure start and finish time |
| 6 | Full Cure | Wait until the coating reaches its stated water-exposure or full-cure time before starting the fountain. Do not rely only on a dry-to-touch condition. | Commonly 3–7 days | Cure period completed under suitable conditions | Temperature, relative humidity, and total cure time |
| 7 | Visual Inspection | Inspect under bright, angled light. Check edges, underside areas, joints, drain holes, mounting points, and locations where water may collect. | 15–30 min | No cracks, blisters, peeling, exposed resin, or unsealed seams | Inspection checklist and photographs |
| 8 | Dry Surface Check | Confirm that the surface is dry before testing. If moisture is suspected, extend the drying period and repeat the check. | Up to 24 h additional drying | No visible condensation or damp patches | Dryness check and environmental conditions |
| 9 | Localized Water Test | Apply a small amount of clean water to a concealed coated area. Observe the coating for whitening, softening, bubbling, or color transfer. | 30–60 min exposure | No softening, tackiness, blistering, or coating transfer | Test area, water exposure time, and result |
| 10 | Controlled Fountain Test | Run the fountain with clean water while monitoring the statue, joints, basin, pump area, and surrounding surface. Start with a short cycle before continuous operation. | 30 min, then 2–4 h | No leakage, coating failure, abnormal staining, or water intrusion | Start and stop times, observations, and photos |
| 11 | Post-Test Inspection | Turn off the pump, let the statue drain, and inspect all coated surfaces again. Pay special attention to standing-water areas and transitions between materials. | 15–30 min | Coating remains intact and the statue shows no new defects | Post-test condition and corrective actions |
| 12 | Routine Maintenance | Inspect regularly, keep water chemistry within the equipment and coating requirements, remove deposits gently, and repair any coating damage before continued exposure. | Monthly; after severe weather | No progressive cracking, peeling, staining, or exposed substrate | Maintenance dates, defects, cleaning, and repairs |
Choose a coating tested for continuous immersion, not rain exposure alone. It should resist water, sunlight, algae-cleaning chemicals, and temperature changes. Some coatings soften around submerged joints. Check the technical sheet carefully.
Request independent adhesion and abrasion test results. Strong adhesion resists tape-pull failure. Lower abrasion loss usually means better wear resistance. These tests do not prove complete fountain safety.
Remove dust, algae, grease, and old residue. Let the resin dry completely. Inspect seams, drain holes, hollow edges, and the base. Repair cracks and pinholes before applying coating. Rushing creates extra work.
No. Test a concealed area first. Check adhesion, color changes, gloss, tackiness, and water contact. Use angled light to reveal missed patches. My first inspection missed a crack beneath a pedestal.
Apply several thin, even layers. Use a fine brush or small foam applicator. Thin coats follow carved details better. Heavy layers can trap bubbles and moisture. Do not block drainage openings.
Follow the stated curing time, temperature, and humidity requirements. Cool, damp weather may extend curing. Keep the statue raised on blocks with air moving underneath. It should feel firm and lack a strong chemical smell. Do not rush this stage.
Place it on a waterproof tray. Run clean water over it for fifteen minutes. Look for whitening, bubbles, tackiness, leaks, and soft areas. Let it dry completely, then repeat the test after twenty-four hours. Weak spots often appear later.
Inspect it after freezing weather, strong sunlight, or heavy splashing. Check the underside, seams, and base for peeling or softened patches. If water reaches the resin, stop using the statue. Dry it fully and repair the failed area. Another coat may only hide the problem.
How to waterproof a resin statue for a fountain? Start by assessing the statue and fountain conditions, including the resin’s current finish, existing damage, water exposure, and surrounding environment. Clean the statue thoroughly to remove dust, algae, grease, and loose material, then allow it to dry completely. Repair cracks, chips, or weak joints before applying any protective product, since a coating cannot replace proper surface preparation.
Choose a waterproof coating specifically suitable for resin and continuous fountain use, ensuring it is safe for contact with water and compatible with the statue’s surface. Apply the coating in thin, even, controlled layers, covering seams, crevices, and other vulnerable areas without creating heavy drips or uneven buildup. Allow each layer to cure according to the product’s instructions. After curing, inspect the statue for missed spots, bubbles, peeling, or surface flaws. Finally, test it gradually in the fountain and monitor the coating for leaks, softening, discoloration, or damage before regular operation.